When I purchased my Garmin Zumo 550, it came with a bunch of Ram mounting hardware that gave me lots of options, none that I really liked. They either looked ugly (bad), blocked part or all of the dash including controls or the ignition switch (worse), or limited the ability to turn the handlebars (a non-starter). So, I looked for another way.
I found an idea that is essentially the same as I describe below and I am indebted to the person who posted that information. So, the information below is from me but born out of an idea of some other unknown person who was kind enough to pass on his idea. I’m doing that here in the same spirit. Pass it on.
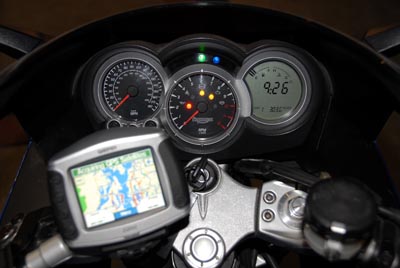
The photo above shows the Garmin (usually in better focus) in place and how it appears from approximately my driving position. The final position is very adjustable because of the Ram mount ball joints. This is how I like it.
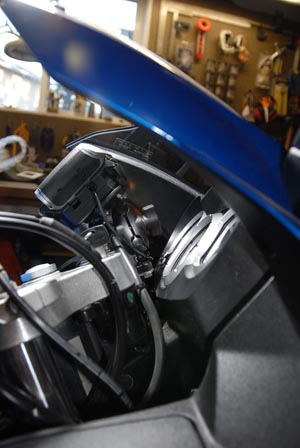
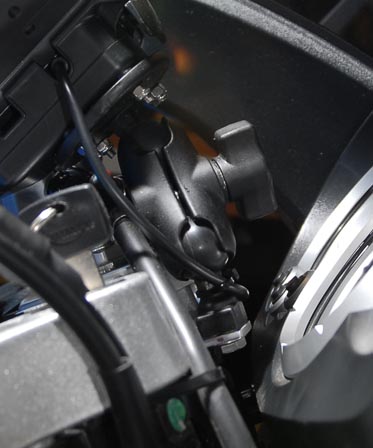
The images above show the mount from the right side of the bike with the handlebars fully right. There is plenty of space between the mount and the dash (more than it looks like here). The image on the right is just a closer look of the mount. The power cable for the GPS is zip tied to the base of the Ram ball.
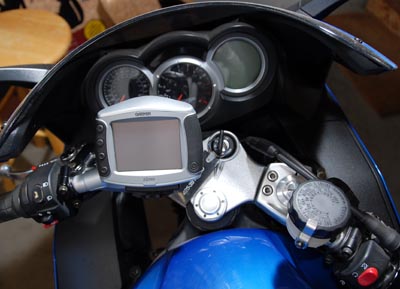
The shot above is from the top looking down, again the bars all the way right. Lots of room for the GPS unit to move without hitting the wind screen.
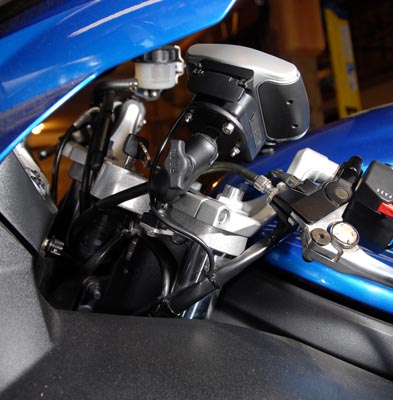
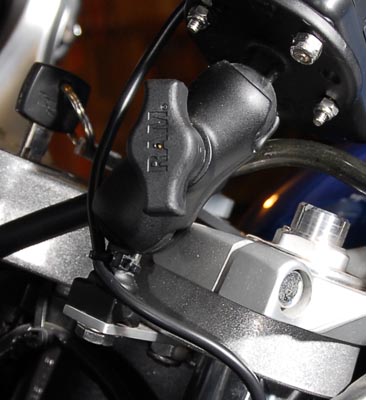
Above are from the left side showing some of the little aluminum bar, nuts holding it on and the Ram ball mount bolted to it. The two cap bolts that are used to hold the left handle bar on are used to hold the aluminum bar on. The only thing needed to do this are the little aluminum bar, two longer cap screws and two nuts that fit the bottom of the screws.
The Garmin Zumo 550 came with some Ram mount parts that were used for this project. One of them has to be modified but the rest is stock. The parts I used were, the mounting plate that attaches to the Garmin dock, the double ball clamp (RAM-101-MUB (I think)), and the ball mount (RAM-B-309-1U). Only the ball mount has to be modified. You will also need some longer cap bolts for the handle bars and some nuts for the ends of those, various lock washers, a bolt to hold the mount to an aluminum bar and the aluminum bar.
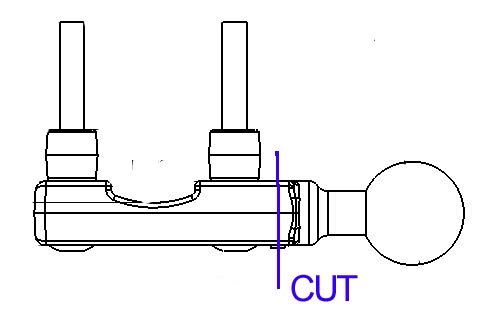
I cut the mount in two close to the top of the slot that would accept the mounting bolt. The top of the ball is just about at the top of the handlebar mount. Once cut, I drilled a hole up towards the ball (perpendicular to the cut) and tapped it for the bolt that holds it on the aluminum bar. Since the ball mount is made of aluminum it was all pretty easy to do. I am sure that Ram has a ball stud that would do the same thing with no modifications but this mount came with the Zumo and I thought I would give it a try.
The aluminum bar is about as wide as the base of the ball mount (about 3/4″) and about 3 3/4 inches long. It needs a hole at the mount end to accept the bolt that holds the mount on and two holes for the two cap bolts that hold the handle bar on to the triple clamp. I used aluminum because that is what I had and it is easy to work with and strong. You can use anything that is strong enough.
Remove the two existing cap bolts from the handle bar and replace them with longer ones. I don’t remember how long they were but I think they were 50 or 55 mm. Put the bar on and hold it in place with a nut. I used nuts with nylon inserts so they would not vibrate loose. I also used lock washers everywhere and thread lock on the bolt in the mount. In the photo below you can see the bolt that holds the mount to the bar and one of the two nuts that holds the bar to the bolt that holds the handle bar on.
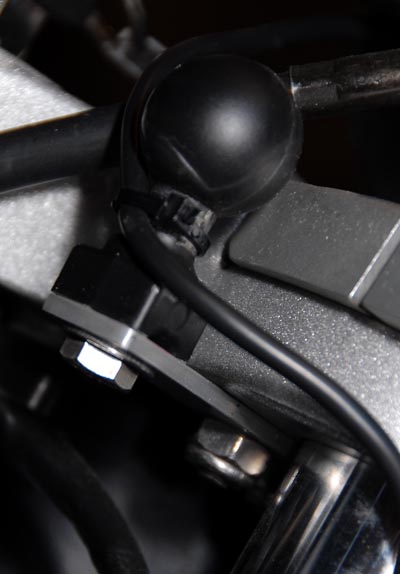
The nice thing about the mount is that the GPS dock can be taken off and the mount is almost invisible. It satisfies the requirements that the GPS is out of the way of the dash and all the controls and it is in a perfect place for actually using it.
Good luck and happy and safe riding.